Enterprise deployment - deploy config_update.xml
It is recommended to use the OnePlaceLive software to publish configuration
updates to a central SharePoint List. These published configuration
updates are consumed (automatically synced) to client machines on a regular
time-interval (configurable). This is the most convenient method for
initially deploying and making any subsequent updates for one of more groups of
users. OnePlaceLive also provides the ability to create and publish Solution
Profiles.
If you don't have user licenses for OnePlaceLive, you can use Group policy
for the deployment of configuration updates. Note: This will require a
restart of the computer for changes to be deployed.
Step 1: Prepare the configuration files
- Create the config_update.xml file that defines the configuration settings .
Step 2: Deploy the Configuration files
There are two options for deploying the configuration files.
Publish centrally and automatically update clients
If users have a OnePlaceLive license, configuration
files can be add to a central list in the OnePlace Solutions SharePoint Site
and synchronized on a regular interval to clients. This is the easiest
method for deploying configuration files and updates.
Prepare Configuration Files for Group
Policy
1. Copy the config_update.xml file to a shared network location
that is accessible to all, ensure all users have read access to this file.
2. Create a blank text file called config_update_<unique code to
designate version of your config file>_deployed.txt e.g.
config_update_20120612_deployed.txt
3. Copy this file to the same shared network location as the
config_update.xml file
4. Using Notepad, create a file called
OPMDeployConfigUpdate.cmd with the following content:
Copy
Code
 @echo off
md %AppData%\OnePlace Solutions
if not exist "%USERPROFILE%\Application Data\OnePlace Solutions\config_update_20120612_deployed.txt" copy "\\sc-server1
\GroupPolicyShare\OnePlace Solutions_ConfigUpdate \config_update.xml" "%USERPROFILE%\Application Data\OnePlace Solutions\config_update.xml" /y
if not exist "%USERPROFILE%\Application Data\OnePlace Solutions\config_update_20120612_deployed.txt" copy \\sc-server1\GroupPolicyShare\OnePlace Solutions_ConfigUpdate\config_update_20090612_deployed.txt "%USERPROFILE%\Application Data\OnePlace Solutions\config_update_20120612_deployed.txt"


tip
Substitute the text in blue with the
filename of the blank text file you created.
Substitute the text in green
with the shared network location where the files have been
created.
Steps to create group policy
If the same MSI is to be used for all users, then you can extend the Group
Policy used for deploying OnePlace Solutions software to also deploy the
config_update.
If you are going to be deploying different config_update.xml files to
different groups of users it is recommended that you create a different Group
Policy for each of the target groups.
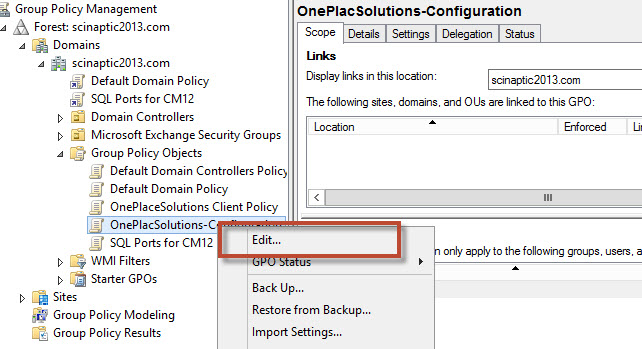
1. Open group policy management editor and select Group Policy Objects,
select New and name the group policy

2. Select the package, right click and select Edit
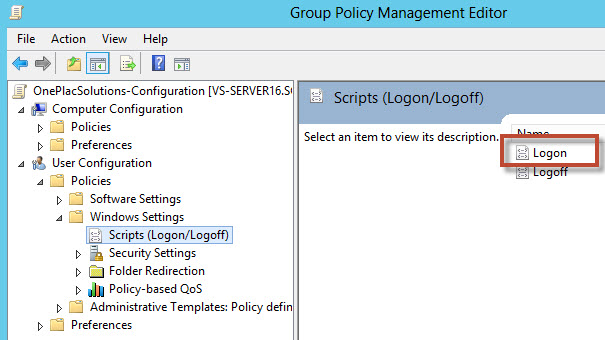
3. Browse to User Configuration | Windows Settings |
Scripts (Logon/Logoff)
Double click the Logon
entry
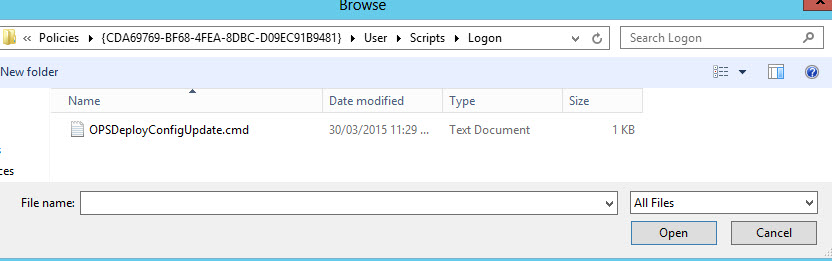
4. Select Show Files and copy the
OPMDeployConfigUpdate.cmd file into the folder
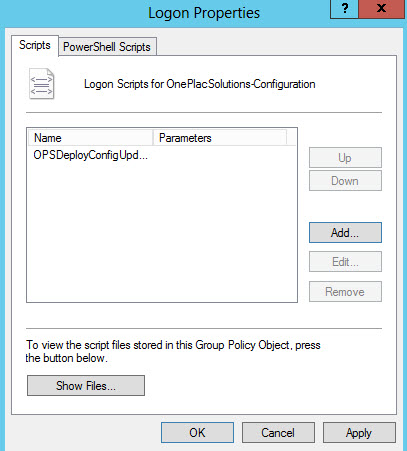
5. Back on the Policy Editor, click Add and
Browse to select the OPMDeployConfigUpdate.cmd file; do not
specify any parameters
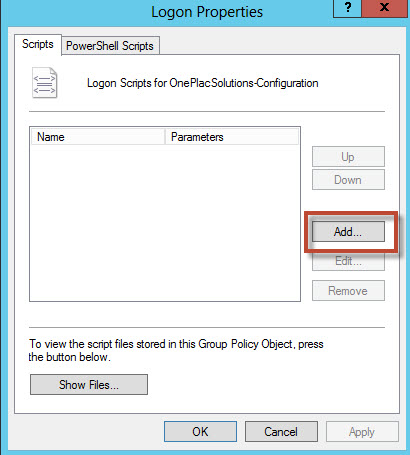
Select Ok
6. Click Apply | Ok and
close Group Policy Editor
- Logoff a user computer and login for the policy change to take effect (you
may need to login twice or restart the computer for the change to be
applied)
- Once the user has started Outlook, the config_update.xml file will be
deleted. The config_update_*_deployed.txt file remains as a flag that the
config_update.xml has been applied and that the Group Policy should not
re-deploy the same config_update.xml file again.
Deploy Updated Configuration settings
(config_update.xml)
This procedure details the scenario of extending an existing OnePlace
Solutions deployment Group Policy, to also deploy an updated
config_update.xml.
1. Create the config_update.xml file that defines the updated
configuration settings (refer to the central configuration instructions).
2. Copy config_update.xml file to a shared network location that is
accessible to all, ensure all users have read access to this file (overwrite the
old config_update.xml file on your network share)
3. Create a blank text file called config_update_<unique code to designate
version of your config file>_deployed.txt e.g.
config_update_20120613_deployed.txt.
4. Copy this file to the same shared network location as the
config_update.xml file.
5. Using Notepad, create a file called
OPMDeployConfigUpdate.cmd with the following content
Copy
Code
@echo off
md %AppData%\OnePlace Solutions
if not exist "%USERPROFILE%\Application Data\OnePlace Solutions\config_update_20120613_deployed.txt" copy "\\sc-server1\GroupPolicyShare\OnePlace Solutions_ConfigUpdate\config_update.xml" "%USERPROFILE%\Application Data\OnePlace Solutions\config_update.xml" /y

if not exist "%USERPROFILE%\Application Data\OnePlace Solutions\config_update_20120613_deployed.txt" copy "\\sc-server1
\GroupPolicyShare\OnePlace Solutions_ConfigUpdate \config_update_20120613_deployed.txt" "%USERPROFILE%\Application Data\OnePlace Solutions\config_update_20120613_deployed.txt"
tip
Substitute the text in blue with
the filename of the blank text file previously created
Substitute the text in green with the
shared network location where the files have been created.
1. Open Group Policy Management Editor
Select the OnePlace Solutions policy and
click the Edit button to launch the Group Policy Object Editor
Select User
Configuration | Windows Settings | Scripts (Logon/Logoff)
Double click Logon
2. Select the OPSDeployConfigUpdate.cmd entry and
click the Remove button
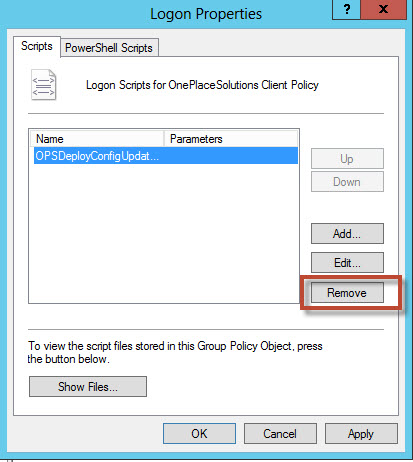
3. Click the Show Files... button
4. Delete the OPMDeployConfigUpdate.cmd file from the
folder
5. Copy the new OPMDeployConfigUpdate.cmd file into the
folder
6. At Policy Editor, click Add and
Browse to select the OPMDeployConfigUpdate.cmd file
Do not specify any parameters,
and click OK.
Click Apply and then OK,
and close the Group Policy Object Editor
- Logoff a user computer and login for the policy change to take effect (you
may need to login twice or restart the computer for the change to be applied)
- Once the user has started Outlook or the OnePlaceDocs Exlporer, the
config_update.xml file will be deleted. The config_update_*_deployed.txt file
remains as a flag that the config_update.xml has been applied and that the
Group Policy should not re-deploy the same config_update.xml file again.