Migrate to Modern Authentication
If you currently have email tracking installed in your SharePoint Online environment, we recommend upgrading to use modern authentication.
The following will guide you through migrating the OnePlace Solutions Email Tracking Service from using Basic Authentication to Modern Authentication.
To complete this process you will need to get the following:
• Your Azure AD Tenant ID
• The Application (client) ID
• The Client Secret
Retrieve Tenant ID
1. Go to https://aad.portal.azure.com/ and sign-in with your Office 365 credentials.
2. Select Azure Active Directory in the left-hand navigation.
3. If not already selected, select Overview from the left-navigation.
4. Copy the Tenant ID value, this is the first piece of information you need.
Create an Application Registration & get the Application ID
An Azure AD Application Registration is what the Email Tracking Service uses to access the Exchange server and categorize mail.
- Go to https://aad.portal.azure.com/ and sign-in with your Office 365 credentials.
- Under Manage, select App registrations.
- Select New Registration and complete the following properties
• Name: OnePlace Solutions Email Tracking
• Supported account types: Accounts in this organizational directory only (Single tenant)
• Redirect URI: Change the dropdown to Public client (mobile & desktop) and set the value to urn:ietf:wg:oauth:2.0:oob
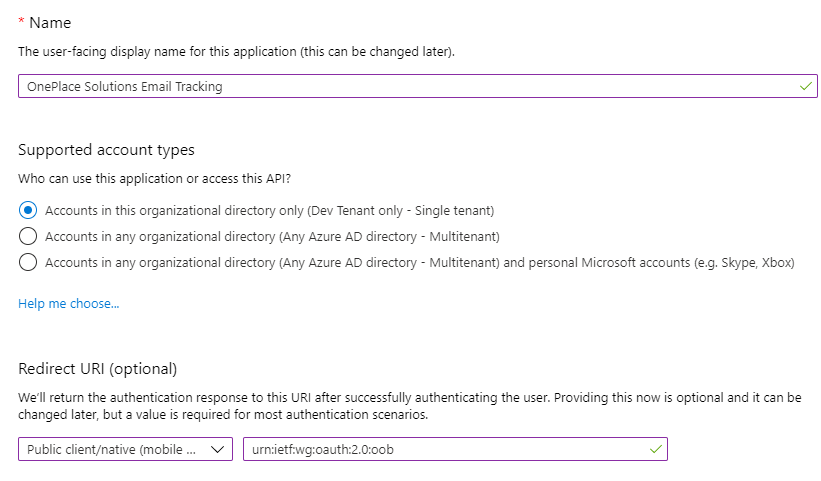
- Select Register
-
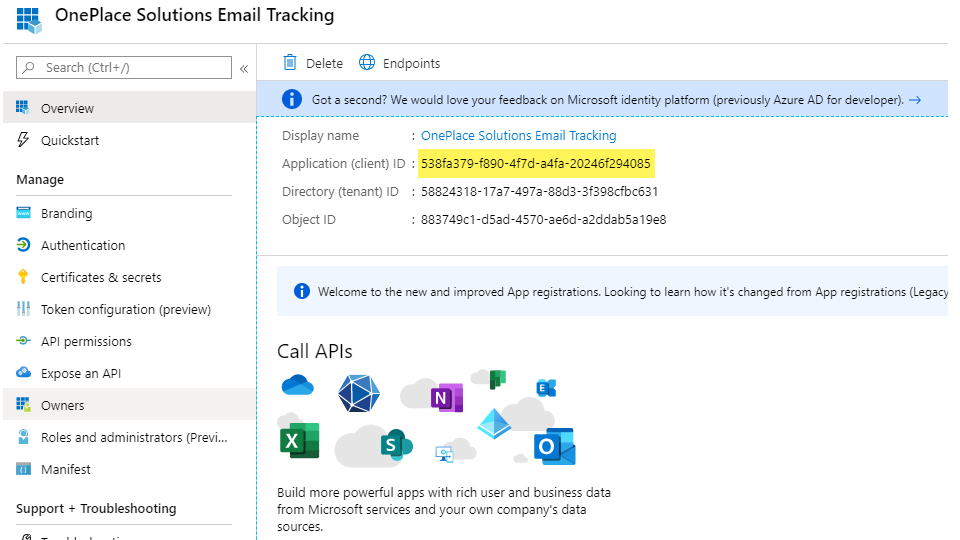
You will be taken to the overview of the Application Registration; copy the Application (client) ID, this is the second piece of information you need.
Assigning permissions
-
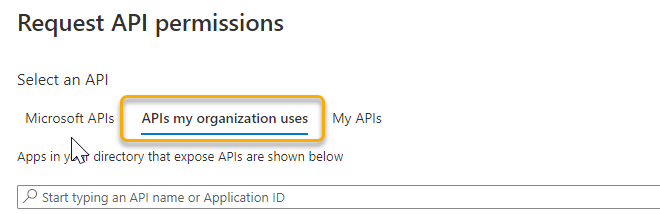
Under Manage, select API permissions and then Add a permission.
-
On the Request API permissions page, select 'API's my organization uses'
-
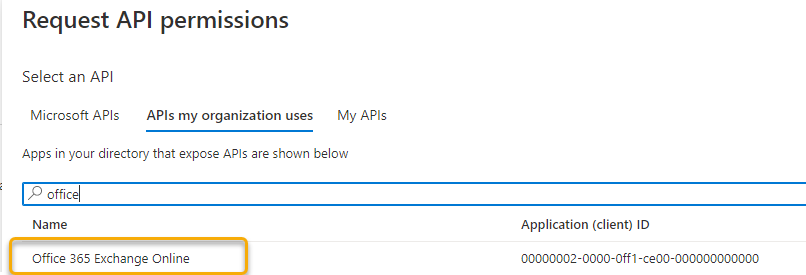
In the search box, search for 'Office' & select 'Office 365 Exchange Online'
-
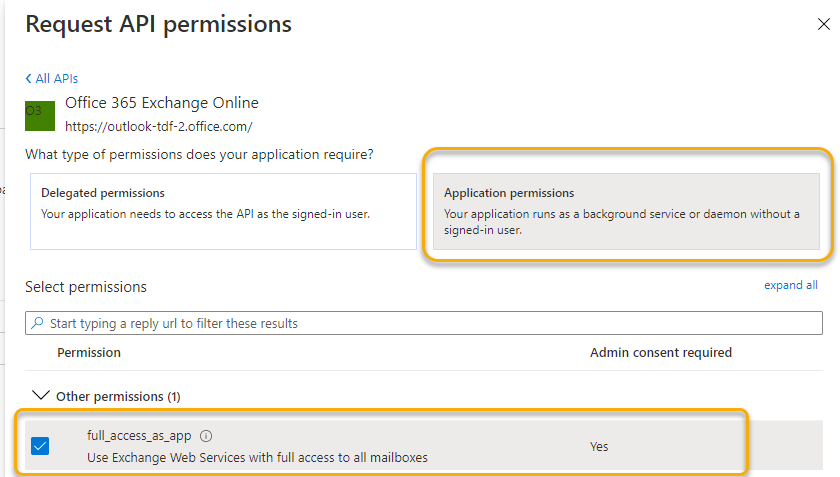
Select Application permissions and then select full_access_as_app. Click on Add
-
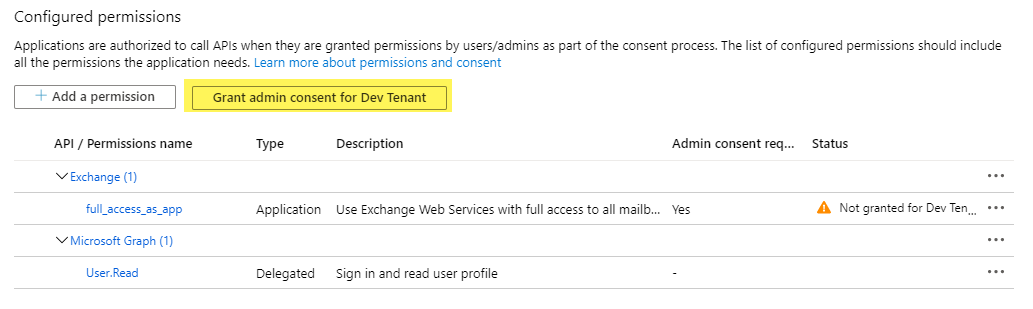
Select Grant admin consent for org and accept the consent dialog
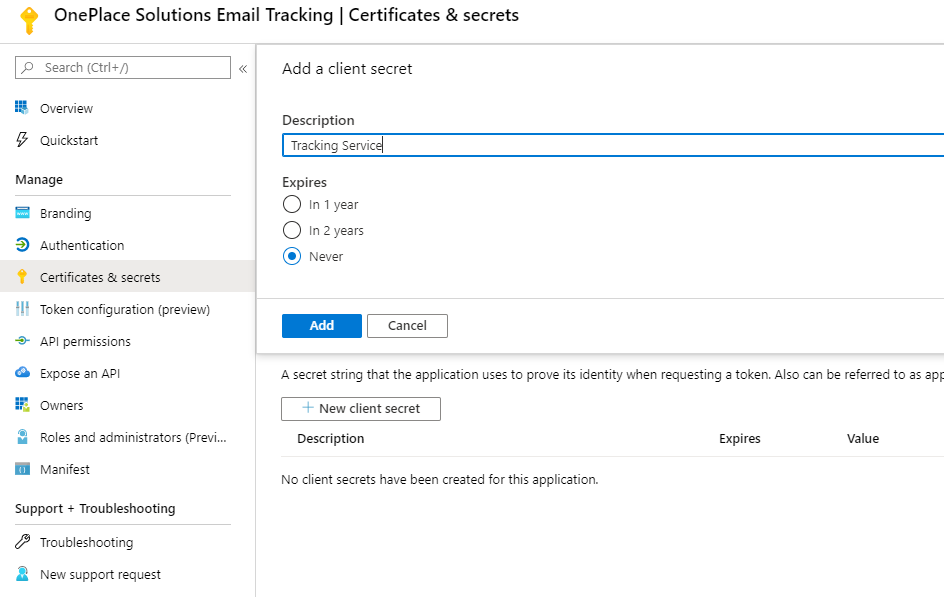
Get Client Secret
- Under Manage, select Certificates & Secrets
- Select New client secret, enter a short description and select an expiry period
-
Select Add
-
Copy down the Value, this is the last piece of information you need