Email site columns
The capture of rich metadata provides for better classification of content and best practice enterprise content management. The availability of metadata means views can be created and SharePoint search can be used more effectively to return content.
Add email site columns to the SharePoint site
OnePlace Solutions provides a number of columns to ensure that email metadata is captured at the time of saving to SharePoint.
The email columns can be deployed via the OnePlace Solutions Administration client for efficient deployment of the email columns, content type and views to your site and document libraries.
-
Launch the OnePlace Solutions Administration client from the desktop
This process does not currently support adding columns to the Content Type Hub. To add columns to the content type hub, please contact support at support at oneplacesolutions.com -
Ensure you are connected to the OnePlace Solutions Admin site
-
Select 'Add Email columns'
-
Select the location to add the email columns. Options are:
-
Site
-
Specific libraries
-
Select Add.
Once all the sites and libraries have been selected, select Next
-
Select ' Yes' to allow content type management
-
Select either an existing content type to add the columns to, or the default ' Create an email content type named OnePlaceMail'
-
Select whether you would like a view to be created. The view will add the following email columns to it:
-
Email has attachment
-
Email Date
-
Email Subject
-
Email From
-
Email To
Select Deploy
-
-
Confirm the results & Select Finish
Option: Manually create the email columns
If required, you can create the columns manually as Site Columns in the site collection.
Please find a list of available email columns:
List columns
OnePlaceMail captures a number of email attributes and promotes these to columns
- These columns must be created with the name (internal names) as they are listed below and can be renamed (display name) once they have been created.
- The email columns are case sensitive.
| Column Name | Column Type |
| EmSubject | Single line of text |
| EmTo | Multiple lines of text |
| EmToAddress | Multiple lines of text |
| EmCC | Multiple lines of text |
| EmBCC | Multiple lines of text |
| EmFrom | Single line of text |
| EmFromName | Single line of text |
| EmDateSent | Date and Time |
| EmDateReceived | Date and Time |
| EmDate | Date and Time |
| EmID | Single line of text |
| EmAttachCount | Single line of text |
| EmAttachmentNames | Multiple lines of text |
| EmCon | Single line of text |
| EmConversationID | Multiple lines of text |
| EmConversationIndex | Multiple lines of text |
| EmCategory | Single line of text |
| EmBody | Multiple lines of text |
| EmSensitivity | Number |
| EmImportance | Number |
| EmToSMTPAddress | Multiple lines of text |
| EmCCSMTPAddress | Multiple lines of text |
| EmBCCSMTPAddress | Multiple lines of text |
| EmFromSMTPAddress | Multiple lines of text |
| EmHasAttachments | Yes/No |
| EmSentOnBehalfOfName | Single line of text |
| EmReceivedOnBehalfOfName | Single line of text |
| EmCompanies | Single line of text |
| EmRetentionPolicyName | Single line of text |
| EmReplyRecipientNames | Single line of text |
| EmReplyRecipients | Single line of text |
| The columns below will capture the original created and modified dates when saving from a network drive to SharePoint | |
| DocCreatedSaved | Date/Time |
| DocModifiedSaved | Date/Time |
The following instructions detail how to
- Create the email content type and Add site columns to the content type
- Add the content type to a document library
- Create an email view on the library
Create email content type
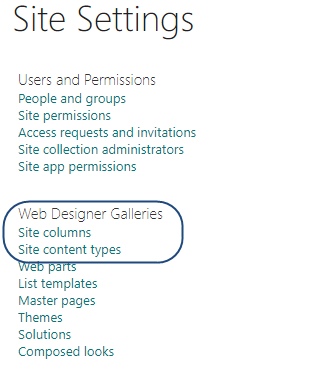
Open Site Settings and navigate to Site Content Types
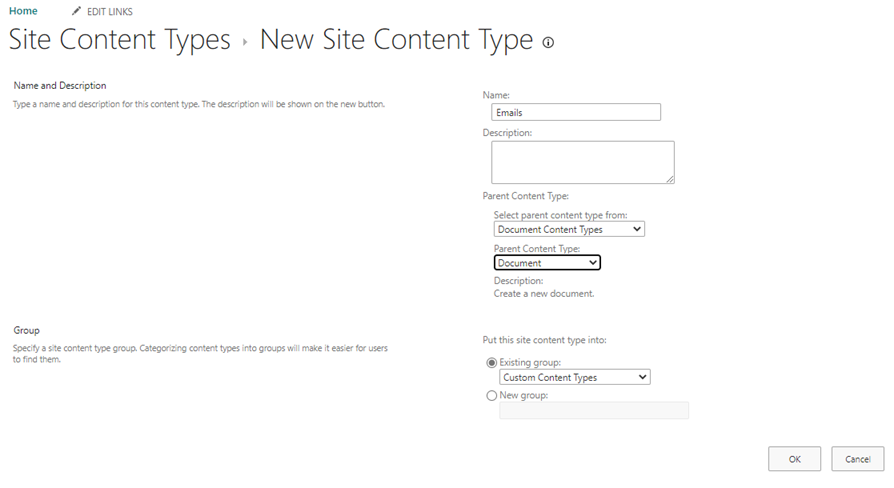
Name the content type
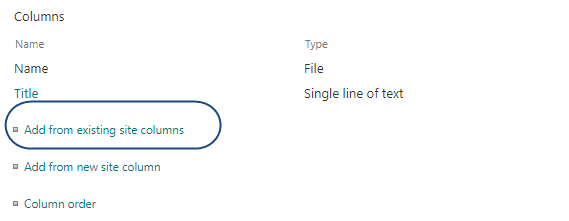
Open the newly created content type, and add columns from existing site columns which were created in previous section
Now you can use this content type and columns in any library inside your site collection
Add the content type to document libraries
The email content type can now be applied to the document libraries where emails will be saved.
- Browse to the document library
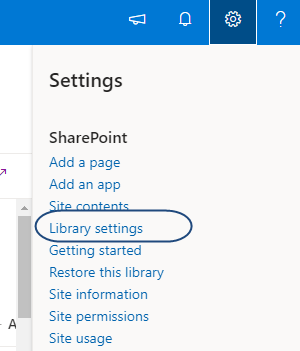
- Select 'Library Settings'
- Select ' Advanced Settings'
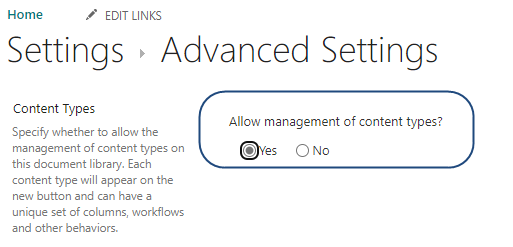
- Set the 'Allow Management of content types' to yes, Select OK
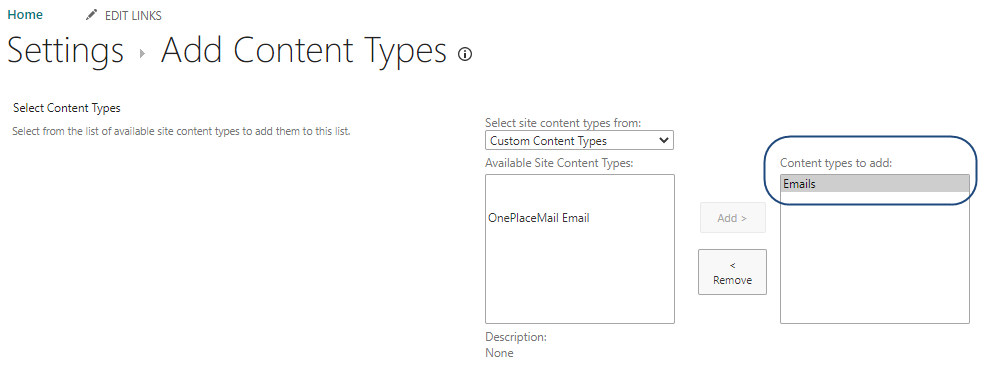
Under 'Content types' select 'Add from existing site content types'

From the drop down, select the previously created email content type. Select Add then OK.
Create the view for email columns
Now that the content type is available in the document library, you can add some email columns to the default view, or create a new view
- Select 'Library Settings'
- Scroll down to 'View's
- Select the default view, or create a new view

Select the email columns to be added to the view
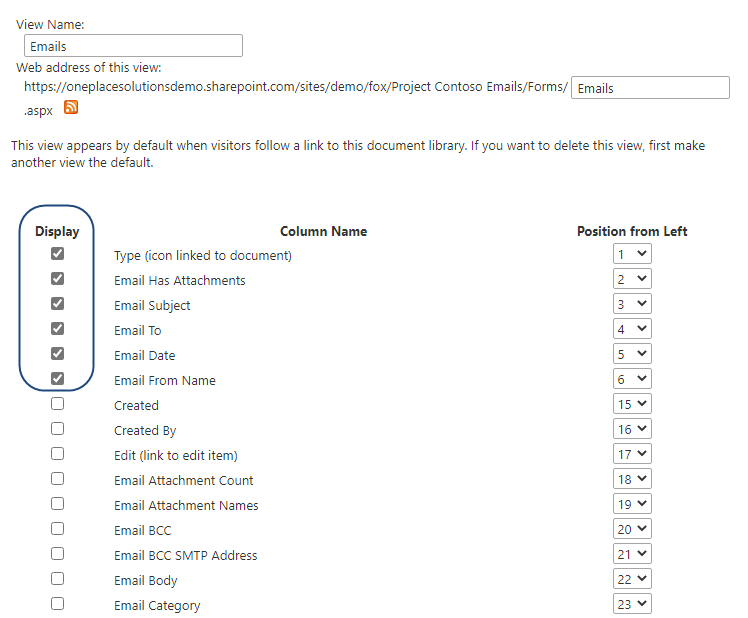
- Select OK
The columns will now be visible, when saving an email to the library the email attributes will be captured and displayed.

