Central Register (location item)
The central register leverages metadata from a custom list built in SharePoint. This can be an existing list, or alternatively can connect to a document library with document sets.
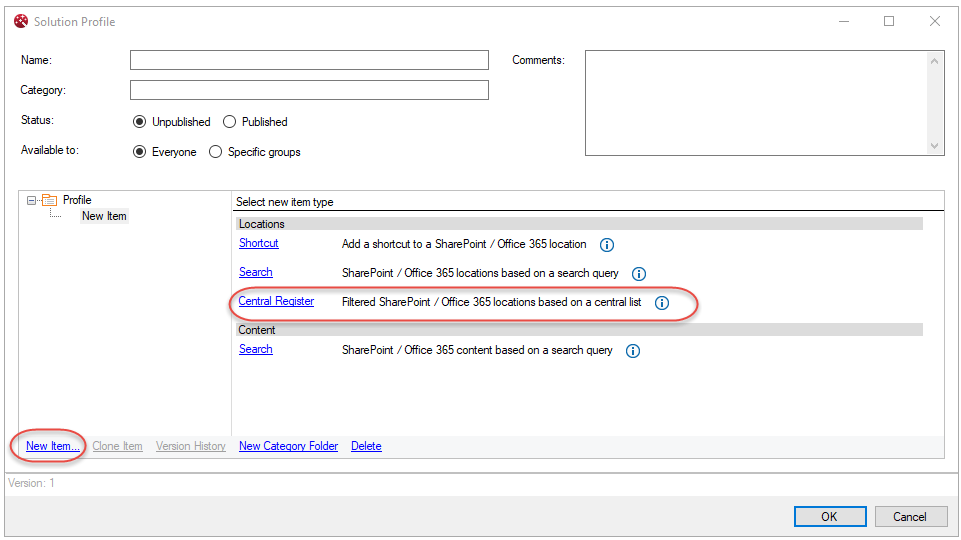
Create a Central Register item
- Select 'New Item > Central Register
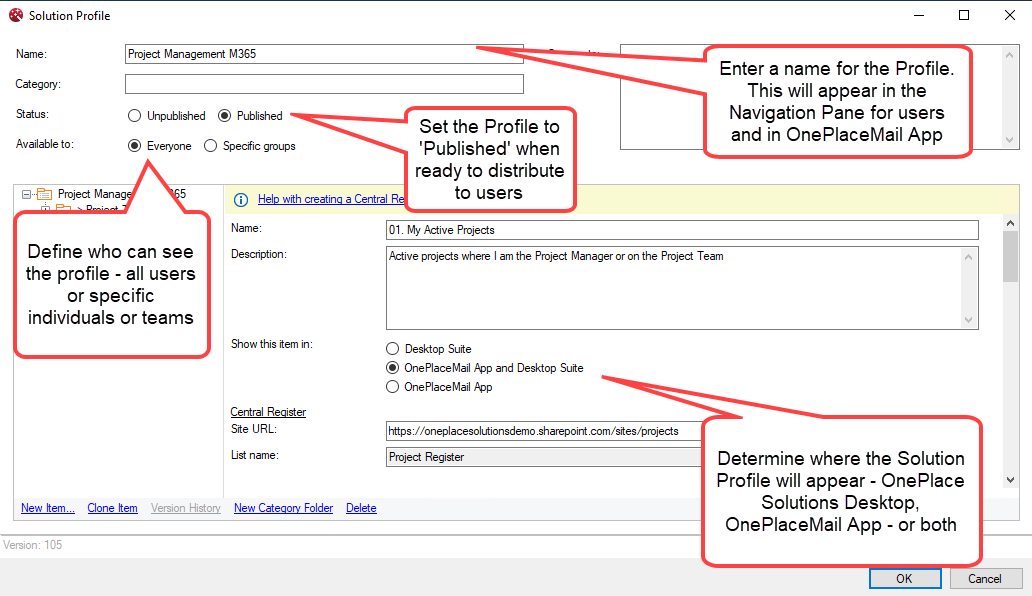
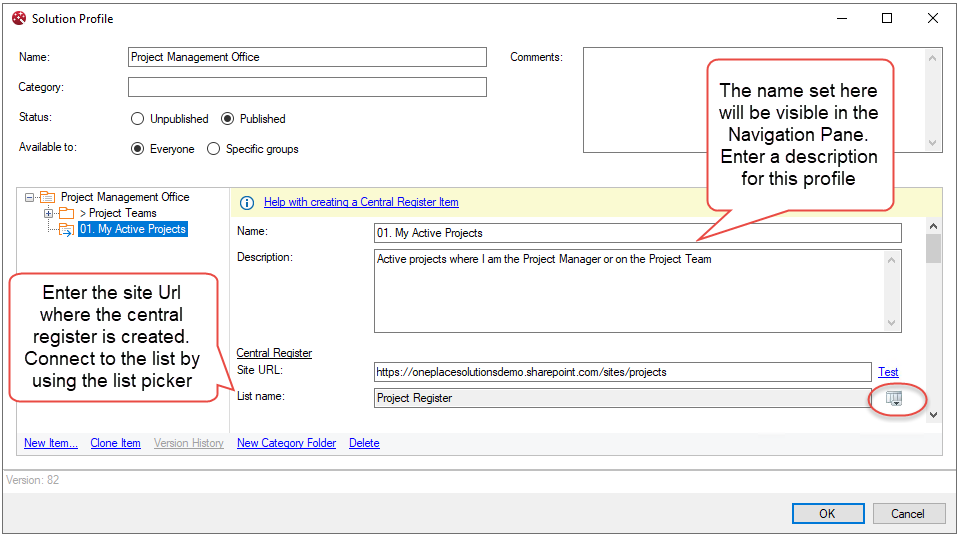
- Specify a name for the profile. The name set here will be visible to users in the Navigation Pane.
- By default the profile is unpublished, to see this is in the Navigation pane, set the profile to 'Published'
- Connect to the site and list that has been created in SharePoint:
- The central register can connect to a list or document library with metadata, select the type to connect to
- The display column will be used to present the locations to end-users. This could be the standard title column or a custom column
- The central register must have a Url column. This column should contain the url of the site, library, or folder.
- Specify the target type that will be returned
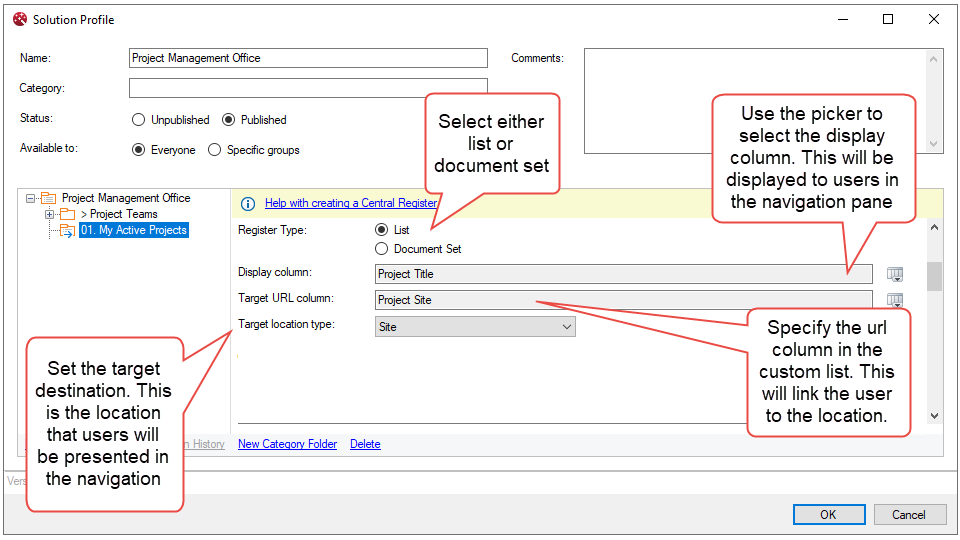
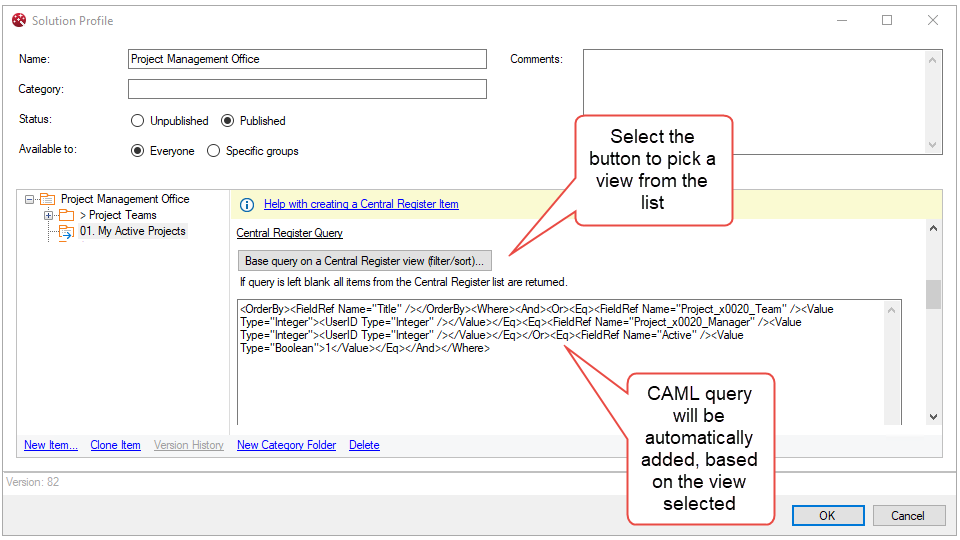
- Select the button to pick a view that has been created in the SharePoint list or library.
-
Alternatively, a custom query can be written freehand here.
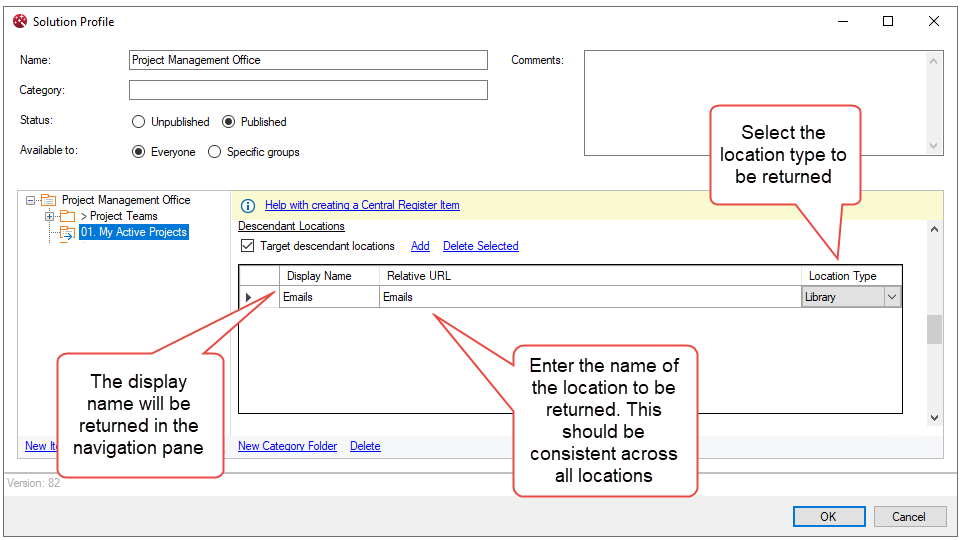
Descendant Locations - Optional
A descendant location allows you to target a location across multiple sites. This can be useful when sites are created based off a template, and the same library structure is available within each site.
For example, if every Project Site has a library named "Email Library", we can target the email library from many different sites.
This will group the 'Email Library' together from many locations into one container
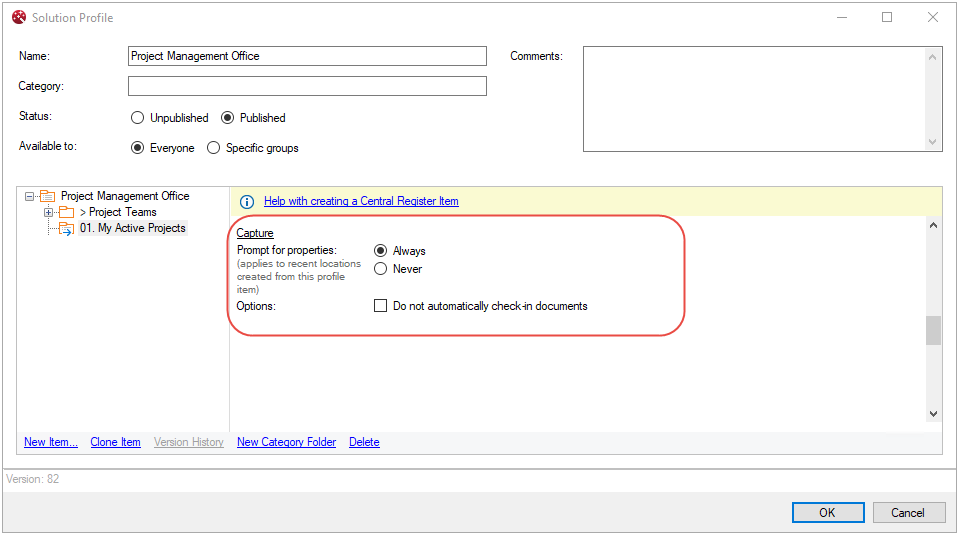
- Set whether the 'Save to SharePoint' dialog will appear for users when saving to these locations.
- Set whether the item should be automatically checked in.
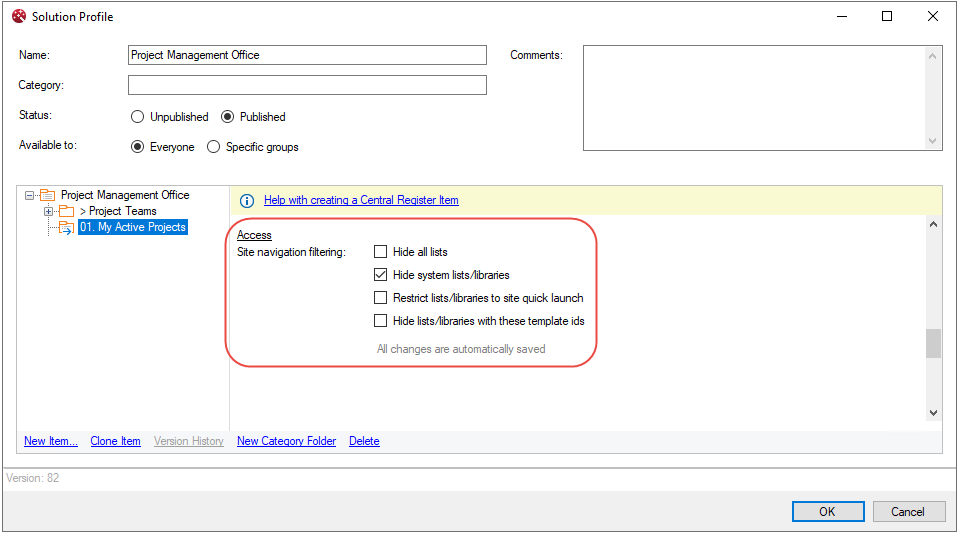
- Refine the locations returned by hiding lists
- Hide system libraries or lists from being visible in the navigation pane
- Restrict locations to those set in the SharePoint quick launch
Video : OnePlaceLive Profiles- how to create a central register item