Connect to SharePoint / Office 365

Prior to using OnePlaceDocs, you must connect to a SharePoint/Office 365 location. 

note

Your OnePlace Solutions Administrator may deploy one or more connection as part of you installation

Make a connection to SharePoint

Adding a connection to SharePoint/Office 365 can be performed from the Navigation tree.  As the navigation tree is shared throughout the OnePlace Solutions suite of products, a connection to SharePoint can be performed in a few places. 

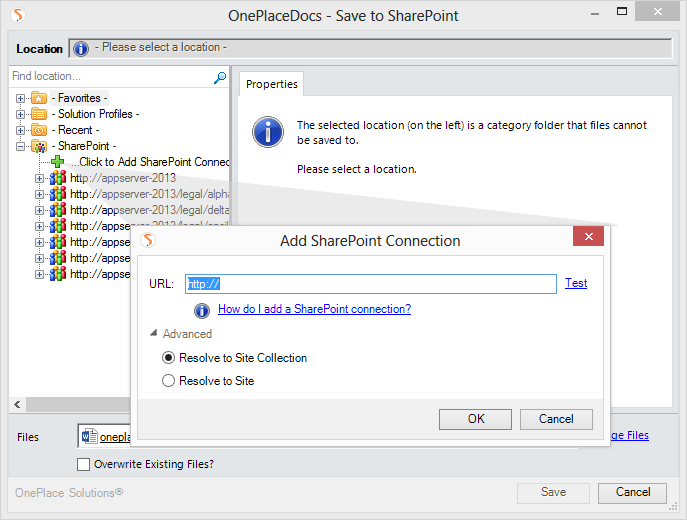
 Option 1: Docs Explorer navigation tree

  1. Open Docs Explorer (from the windows task tray) - see starting Docs Explorer
  2. Select '... Click to Add SharePoint Connection"

    The following dialog will appear:


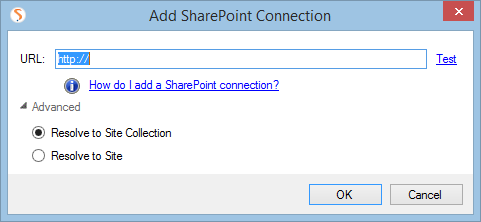
  3. Enter (Copy / Paste from Web browser) the SharePoint URL
  4. (optional) Modify the Advanced options to select 'Resolve to the Site level'
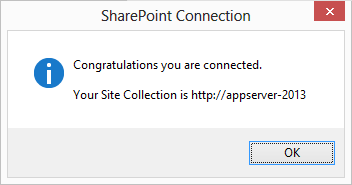
  5. Select 'Test' to resolve the URL to the current Site Collection or Site
  6. Select 'Ok'


 Option 2: Save content and add a connection

  1. Open an Office document (Word, Excel, PowerPoint) or an Adobe Acrobat document
  2. Select 'Save to SharePoint' on the Office ribbon or 'Save Copy to SharePoint' in Adobe Acrobat
  3. Select '...Click to Add SharePoint Connection...' under the SharePoint node of the navigation tree

  4. Enter (or Copy/Paste from your web browser) a SharePoint site URL
    • Optionally: select Advanced to resolve the entered URL to the Site as apposed to the Site collection
  5. Select 'OK' to resolve and confirm the connection.


Upon successfully connecting to SharePoint/Office 365, you will receive a success window.

The resulting connections will appear in the navigation tree as shown below.


tip

You can add connections to one or more SharePoint environments.  This may include both Office 365 and on-premise installations.