Central Register (location item)

|
To create a central register, a custom list in SharePoint must be created first. |
Create a Central Register item
- Select 'New Item...
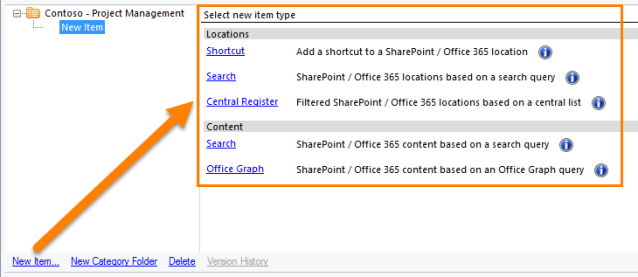
- Choose 'Central Register' from the new item type
|
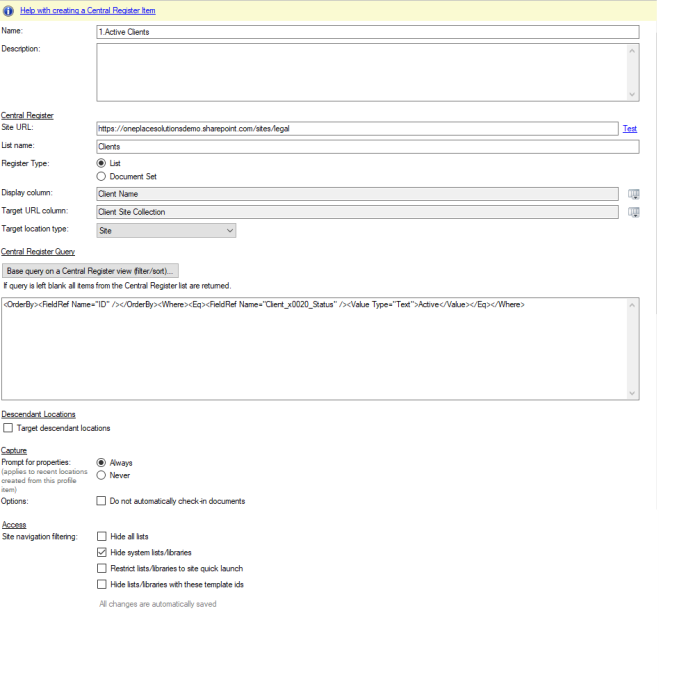
Name
|
This is the name of the search as it will appear in the navigation tree for OnePlaceMail and OnePlaceDocs |
|
Description
|
Enter a description of the item to be created |
Central Register
| Site URL | Enter the URL of the central list, or document set containing the central register list |
| List Name | Enter the name of the list, or document library that will be used to return locations |
| Register Type | Options are; List or Document Set |
| Display Column | Select the column that will be used to name the item returned. This can be title or a custom single line of text column. |
| Target URL Column | Select the URL column from the central register. |
Central Register Query
| Base query of a Central Register view | Selecting this button will present a view to select any custom views created in SharePoint. Selecting a view will add the CAML query to the dialogue box below. |
| Query dialog box |
If selecting a custom view from the button above will show the query here. Alternatively, a custom query can be written freehand here.
|
Descendant Locations
A descendant location allows you to target a location across multiple sites. This can be useful when sites are created based off a template, and the same library structure is available within each site.
For example, if every Project Site has a library named "Email Library", we can target the email library from many different sites.
This will group the 'Email Library' together from many locations into one container
| Display Name | Customize the name of the location to be returned |
| Relative URL | Enter the name of the library to be targeted |
| Location Type | Specify the location type of the targeted location |
Capture
Determine the behavior when saving to a returned central register item in the solution profile
| Prompt for Properties | Always | Selecting this option, the 'Save to SharePoint' dialog box will always appear to ensure metadata is captured |
| Never | Selecting this option, the 'Save to SharePoint' dialog box will not appear | |
| Options | Do not automatically check in documents | By default, OnePlace Solutions will check in a document in the save process. If other workflows need to be run, this setting can be turned off |

Access
Set the locations that are returned when navigating a location returned in a search
Site navigation filtering
| Hide all lists | Restrict navigation tree to hide any lists when browsing the returned search locations |
| Hide system lists / libraries | Restrict the navigation tree to hide all system libraries and lists when browsing the returned search locations |
| Restrict lists / libraries to site quick launch | Restrict the navigation tree to show only locations specified in the site quick launch |
| Hide lists / libraries using specific template ids | Restrict the navigation tree to hide lists or libraries based on specific template ids |

Video : Solution Profiles - how to create a central register item
Example: